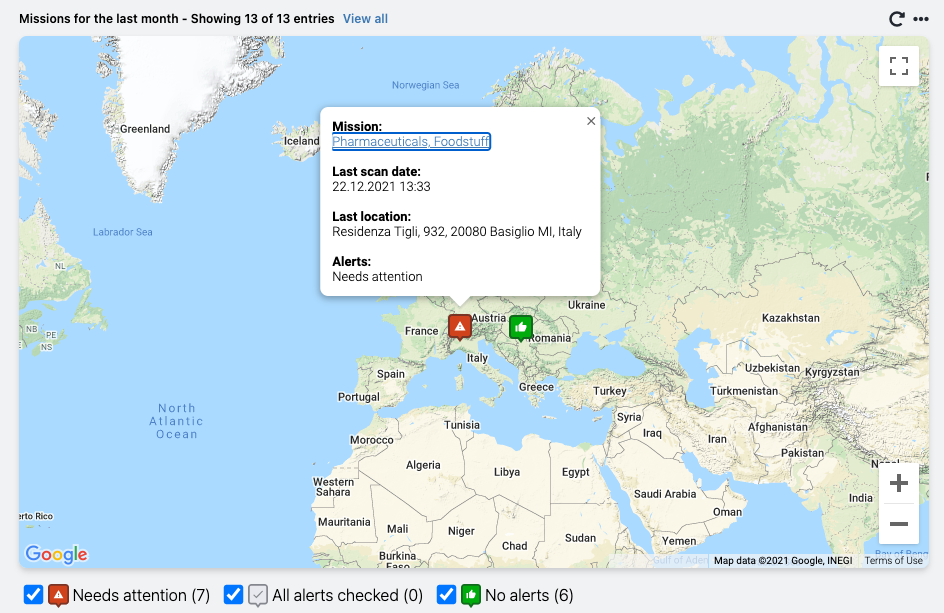
Missions on map shows the last known locations of missions on a map. The locations will show the alert status: no alerts, alerts checked, or mission needs attention.
- Go to the Dashboard in your Logmore Cloud.
- Scroll down to the bottom of the page and select Add report.

- Select Missions on map.
- Add filter(s) for the report to display the missions you're interested in (e.g., only with alerts triggered or shipped via a certain route or for a specific time period). Check this article for more details on adding filters.
- Click Next.
- Enter the Report name to match the type of data displayed.
- Click Save report.
- By checking the boxes, you can select which missions (based on their alerts) you want to see on the map.
- Clicking on a green, gray, or red icon on the map will show a quick summary of the Mission. Click on the Mission's name to get to the Mission's page.
- Left-click of the mouse lets you move the map. Use + and - to zoom in and out (just like in standard Google Maps).
