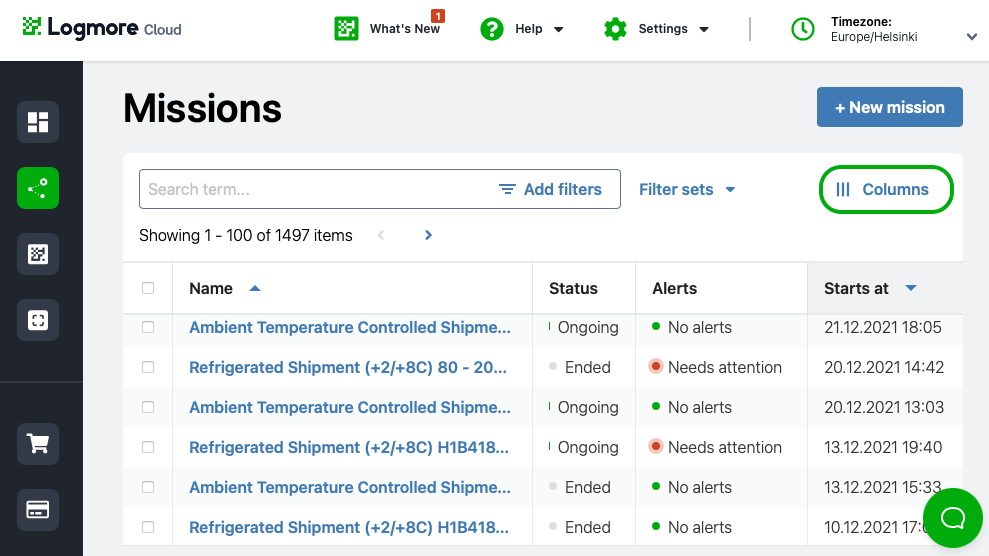
You can review all the ongoing and ended Missions on the Missions page. It shows a table with the status of each of your Missions including and any information you define to be shown. The page helps you quickly understand what is going on with your shipments and analyze your shipment data efficiently. The Missions table also has a variety of helpful filtering options.
In this article:
Locate and edit the Missions table
Search and add filters to the Missions table
Download the Missions table as an Excel
Locate and edit the Missions table
- The Missions page is located on the left navigation panel. From there, you will have a table with all your Missions.
- To configure the data shown in the table, click Columns.
- Select the information you want to see in the table and click Apply changes.
- Now the table shows only the columns you have chosen.
- You can sort certain entries in alphabetical order or based on the date by clicking the arrow (▲ or ▼) next to the column's name.

Search and add filters to the Missions table
You can search for any Mission by a key term or create filters to see only the Missions with specific parameters (for example, based on Custom fields, data status, or a time period).
- For a simple search, enter the term in the search field. You can search by the Mission's name, destination, etc.
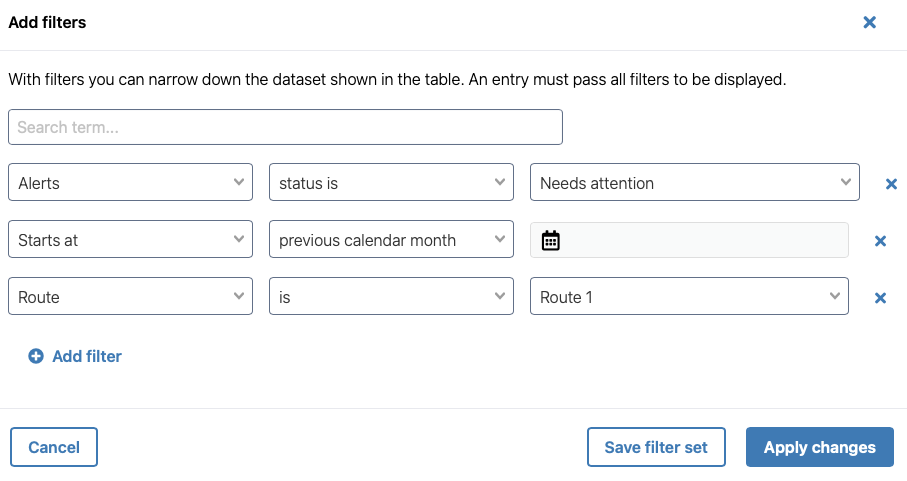
- For an advanced search, select Add filters. A new window will open.
- You can base the filter on a search for a specific term in your Missions' data (for example, a destination point).
- Create a filter for a specific data type to see only Missions that fall under the filter set.
- Click +Add filter to apply multiple filters at the same time.
When you add multiple conditions, only the loggers are shown that satisfy ALL the conditions specified. - To save this filter for further use, click Save filter set. Name it.
- If you don't want to save the filter set for further use, click Apply changes.
- You will see the filtered results in the table.
- To access saved Filters, click Filter sets and select the one you need.
For example, this filter set shows only the Missions that had alerts within shipments started last month and shipped via Route 1.

Download the Missions table as an Excel
You can export the Missions table as an Excel — as is or with filters applied. You will get a table with an overview of all or selected Missions. Note that it will contain metadata but not the measurement data. For downloading measurements in Excel, check this article.
- Configure the data shown in the table by clicking Columns to the right on the Missions page (see above).
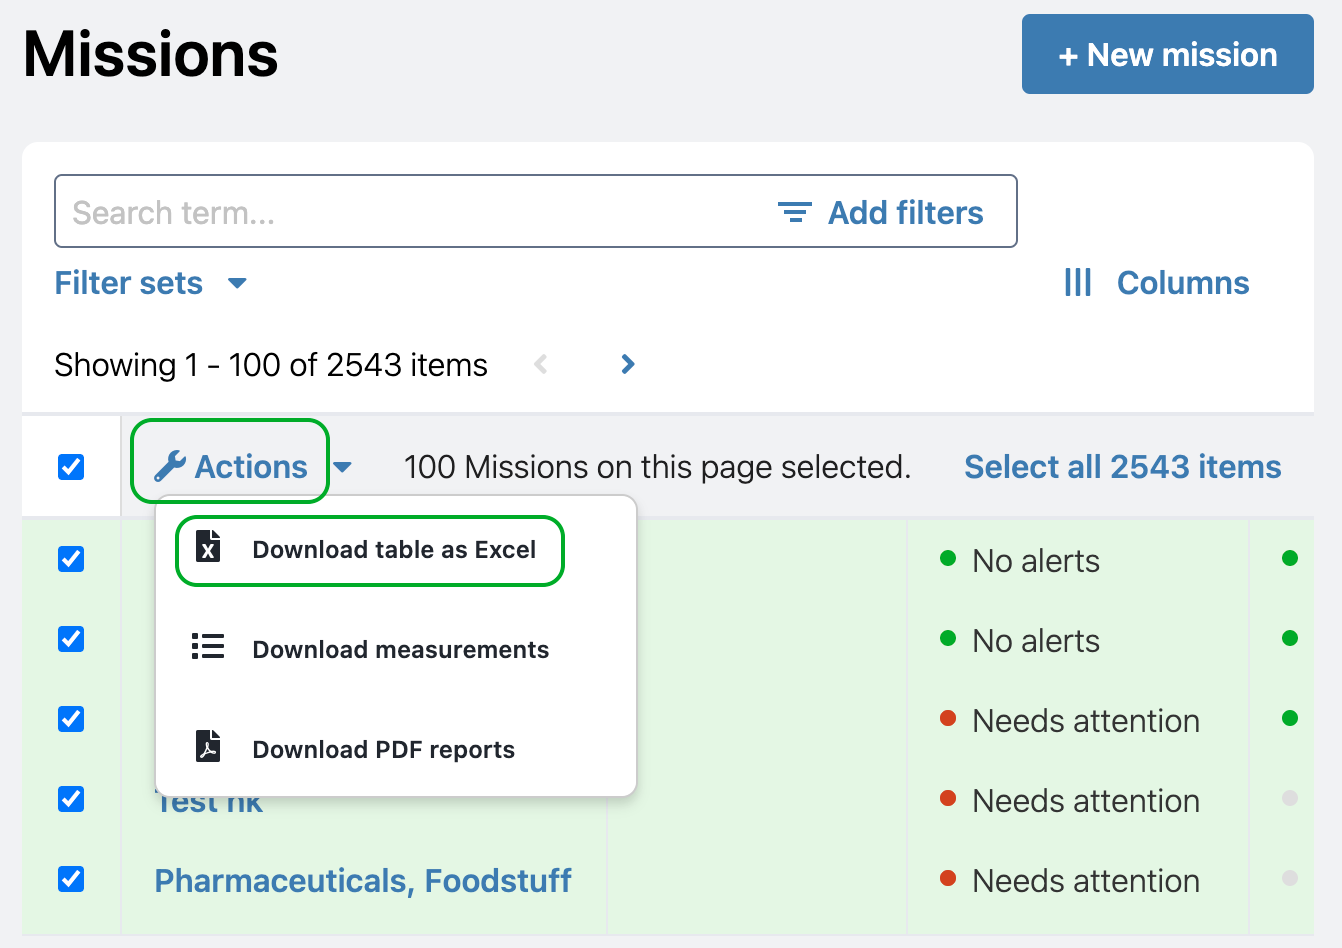
- Select the Missions you want to appear in the table.
- Select individual Missions by checking the box next to that mission’s name.
- Select all Missions on the list by checking the box next to Name in the first row.
- Apply filters (based on date, data status, etc.) to select only relevant Missions. Check the box next to Name in the first row to select the filtered items (see above).
- Click Actions in the top row and select Download table as Excel.
- The file will be immediately downloaded to your device.
