This article will guide you through adding new Custom fields. Custom fields allow you to add and store extra data within Missions and further analyze it, check the details here.
Before including Custom fields in a Mission or a Mission template, you need to create them first. You can also create new Custom fields directly when creating or editing a Mission template.
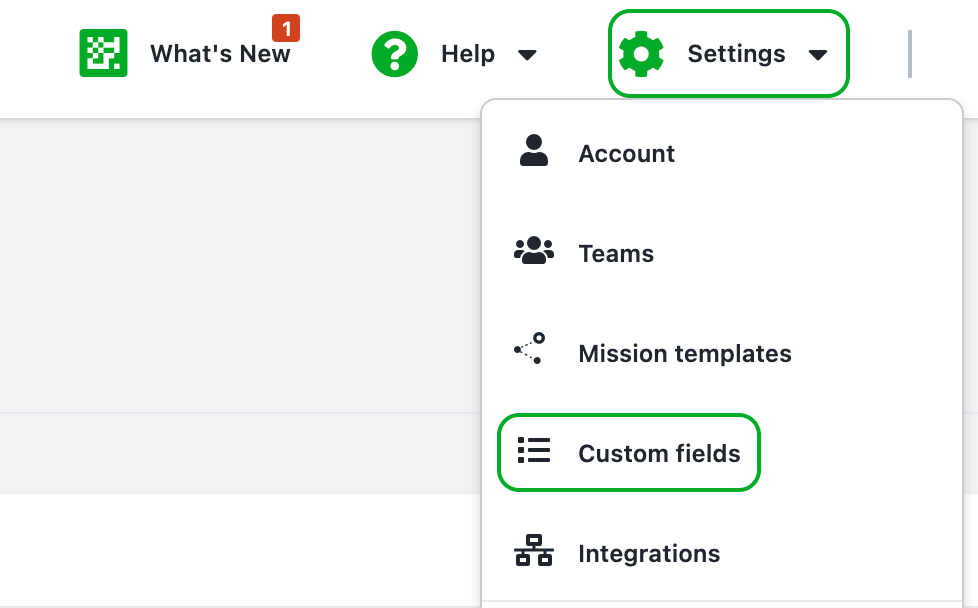
- Go to Settings (upper navigation panel) and select Custom fields.

- There you will see the Custom fields you've created so far. Select Create new.
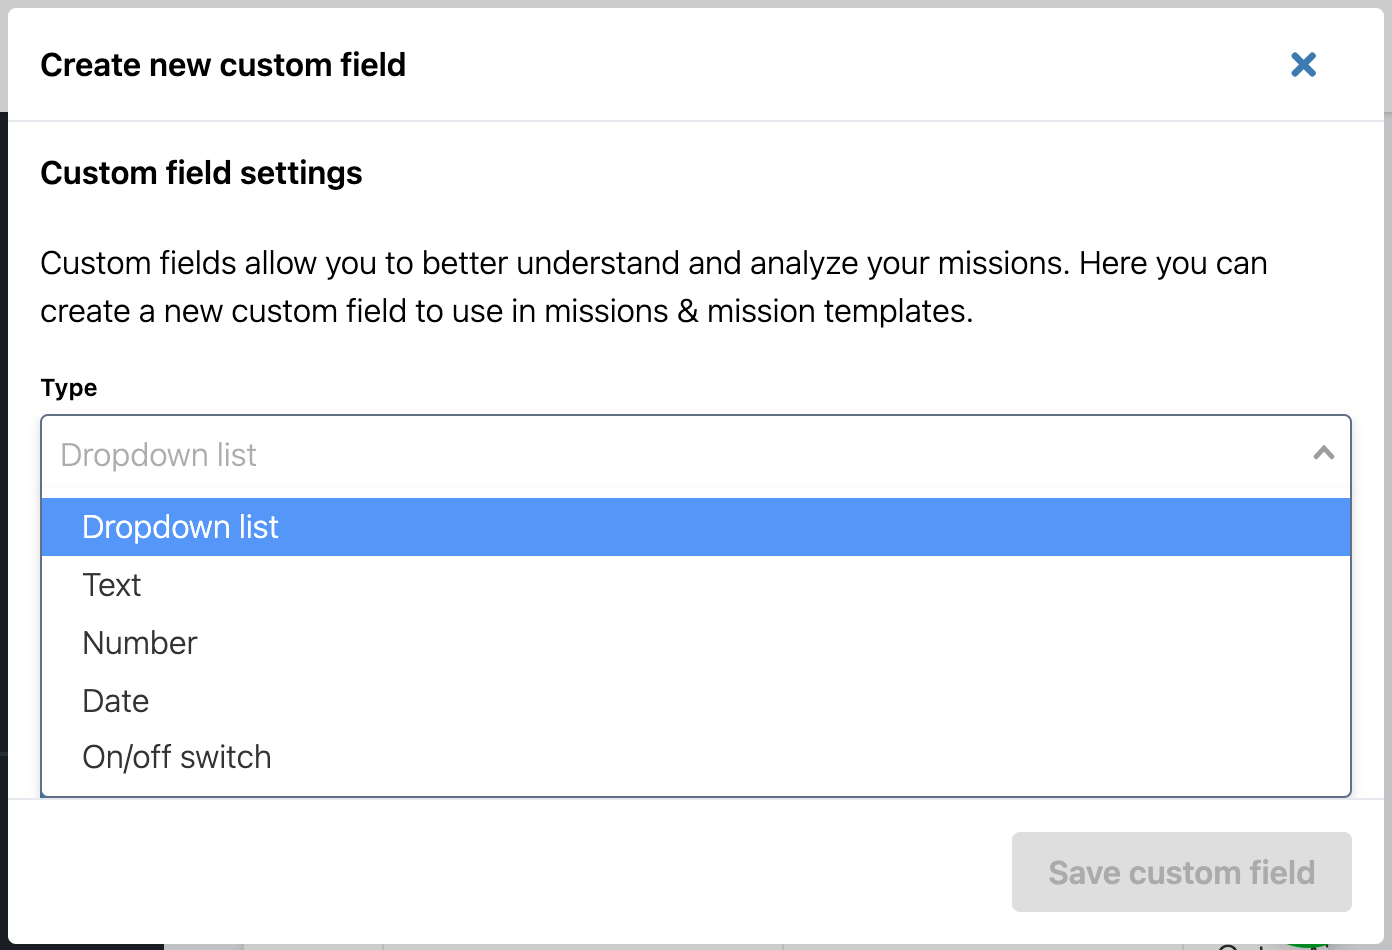
- Custom field settings window will open. Fill in the required fields.
- Select the suitable Type from the list.

We recommend utilizing the Dropdown list and On/off switch Custom fields for their simple user experience. They also allow using the Mission breakdown reports in your Dashboard.
If you chose the Dropdown list, you need to add list items by clicking Add new option. The user creating a Mission will be able to choose from these options. - Name: give the Custom field a descriptive name.
- Teams with access: select the teams that will have access to the information from this Custom field.
- Once you are done, click Save custom field.
- Select the suitable Type from the list.