To send shipments with Logmore Scanpoint you need:
- A unique barcode ID for each mission
- This barcode can be any 2D barcode. Usually it's air waybill or a tracking ID.
- Logmore QR data loggers
- Logmore Scanpoint only works with Logmore QR data loggers
- At least one Mission template (see more details on Mission template creation here)
Scan and start Missions
- Open the Home menu of the Scanpoint (by pressing the O button).
-
Select Prepare Shipments.

-
Select a correct Mission template from the list to be used for the shipments you are sending.
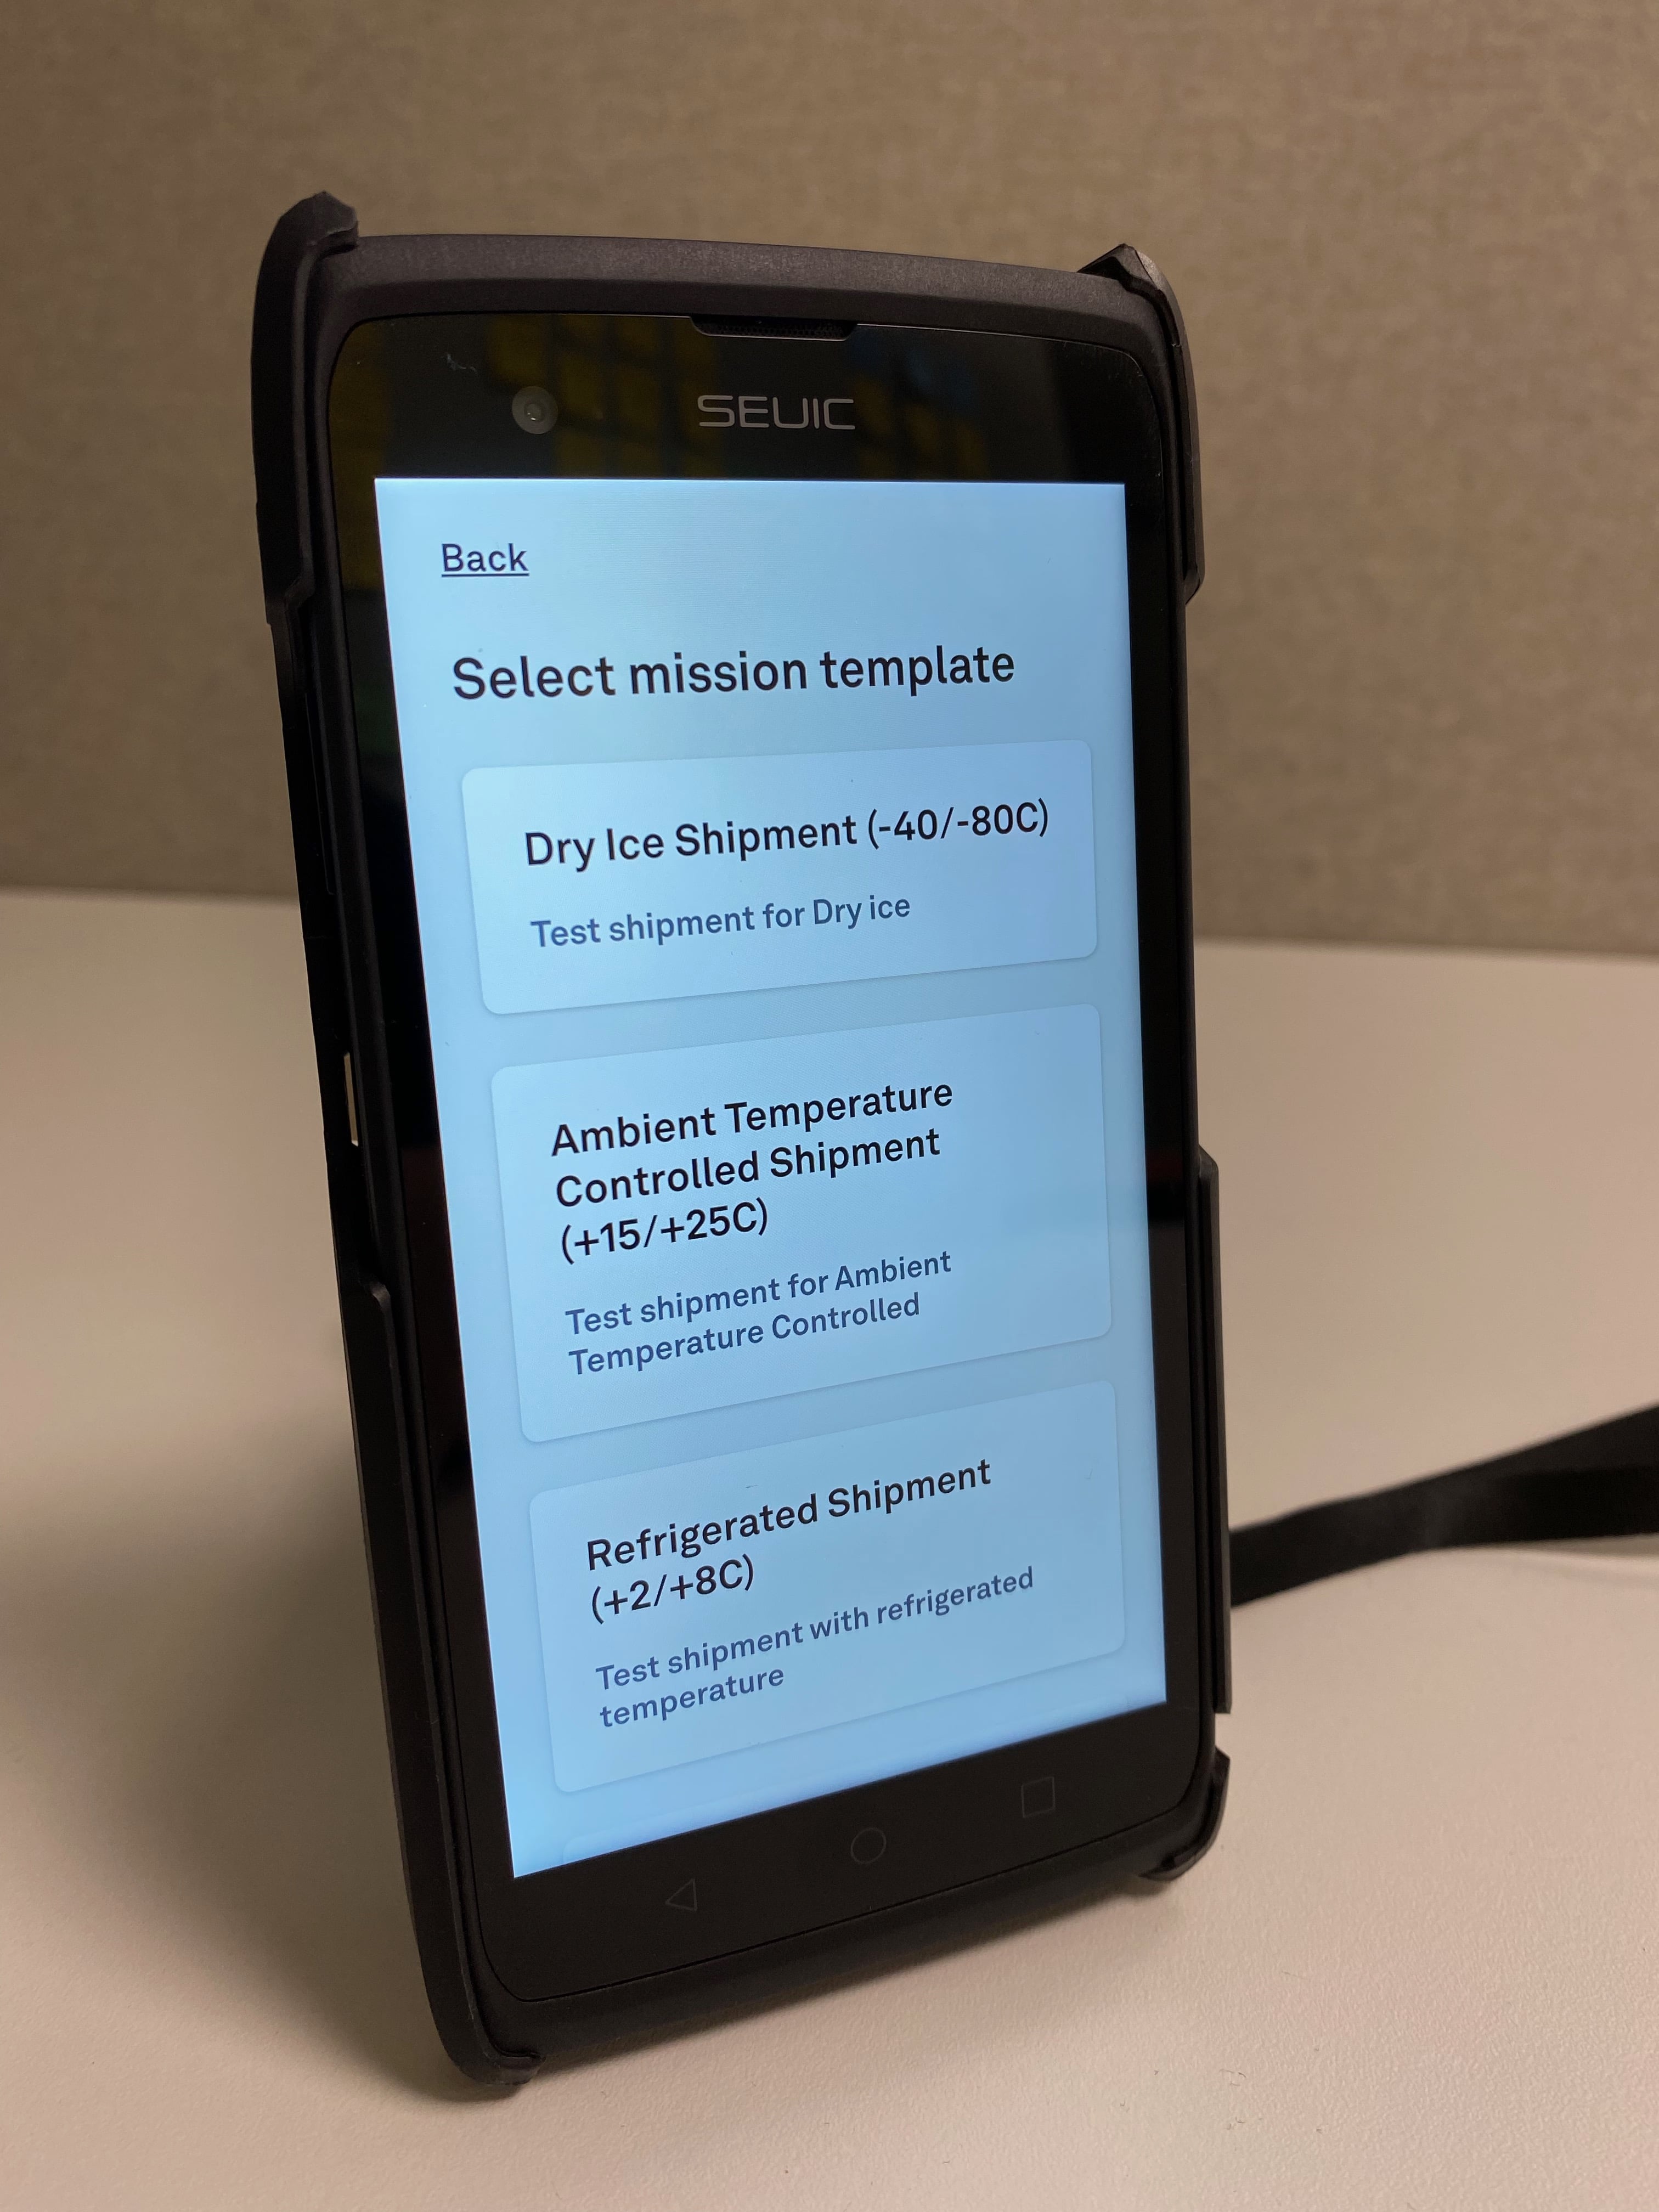
If a user has access to only one Mission template, that Mission template is automatically selected. -
Set the delay in minutes for Missions.
Leave the field blank for the default delay to be 0 minutes (meaning that the Mission will start immediately after scanning the logger).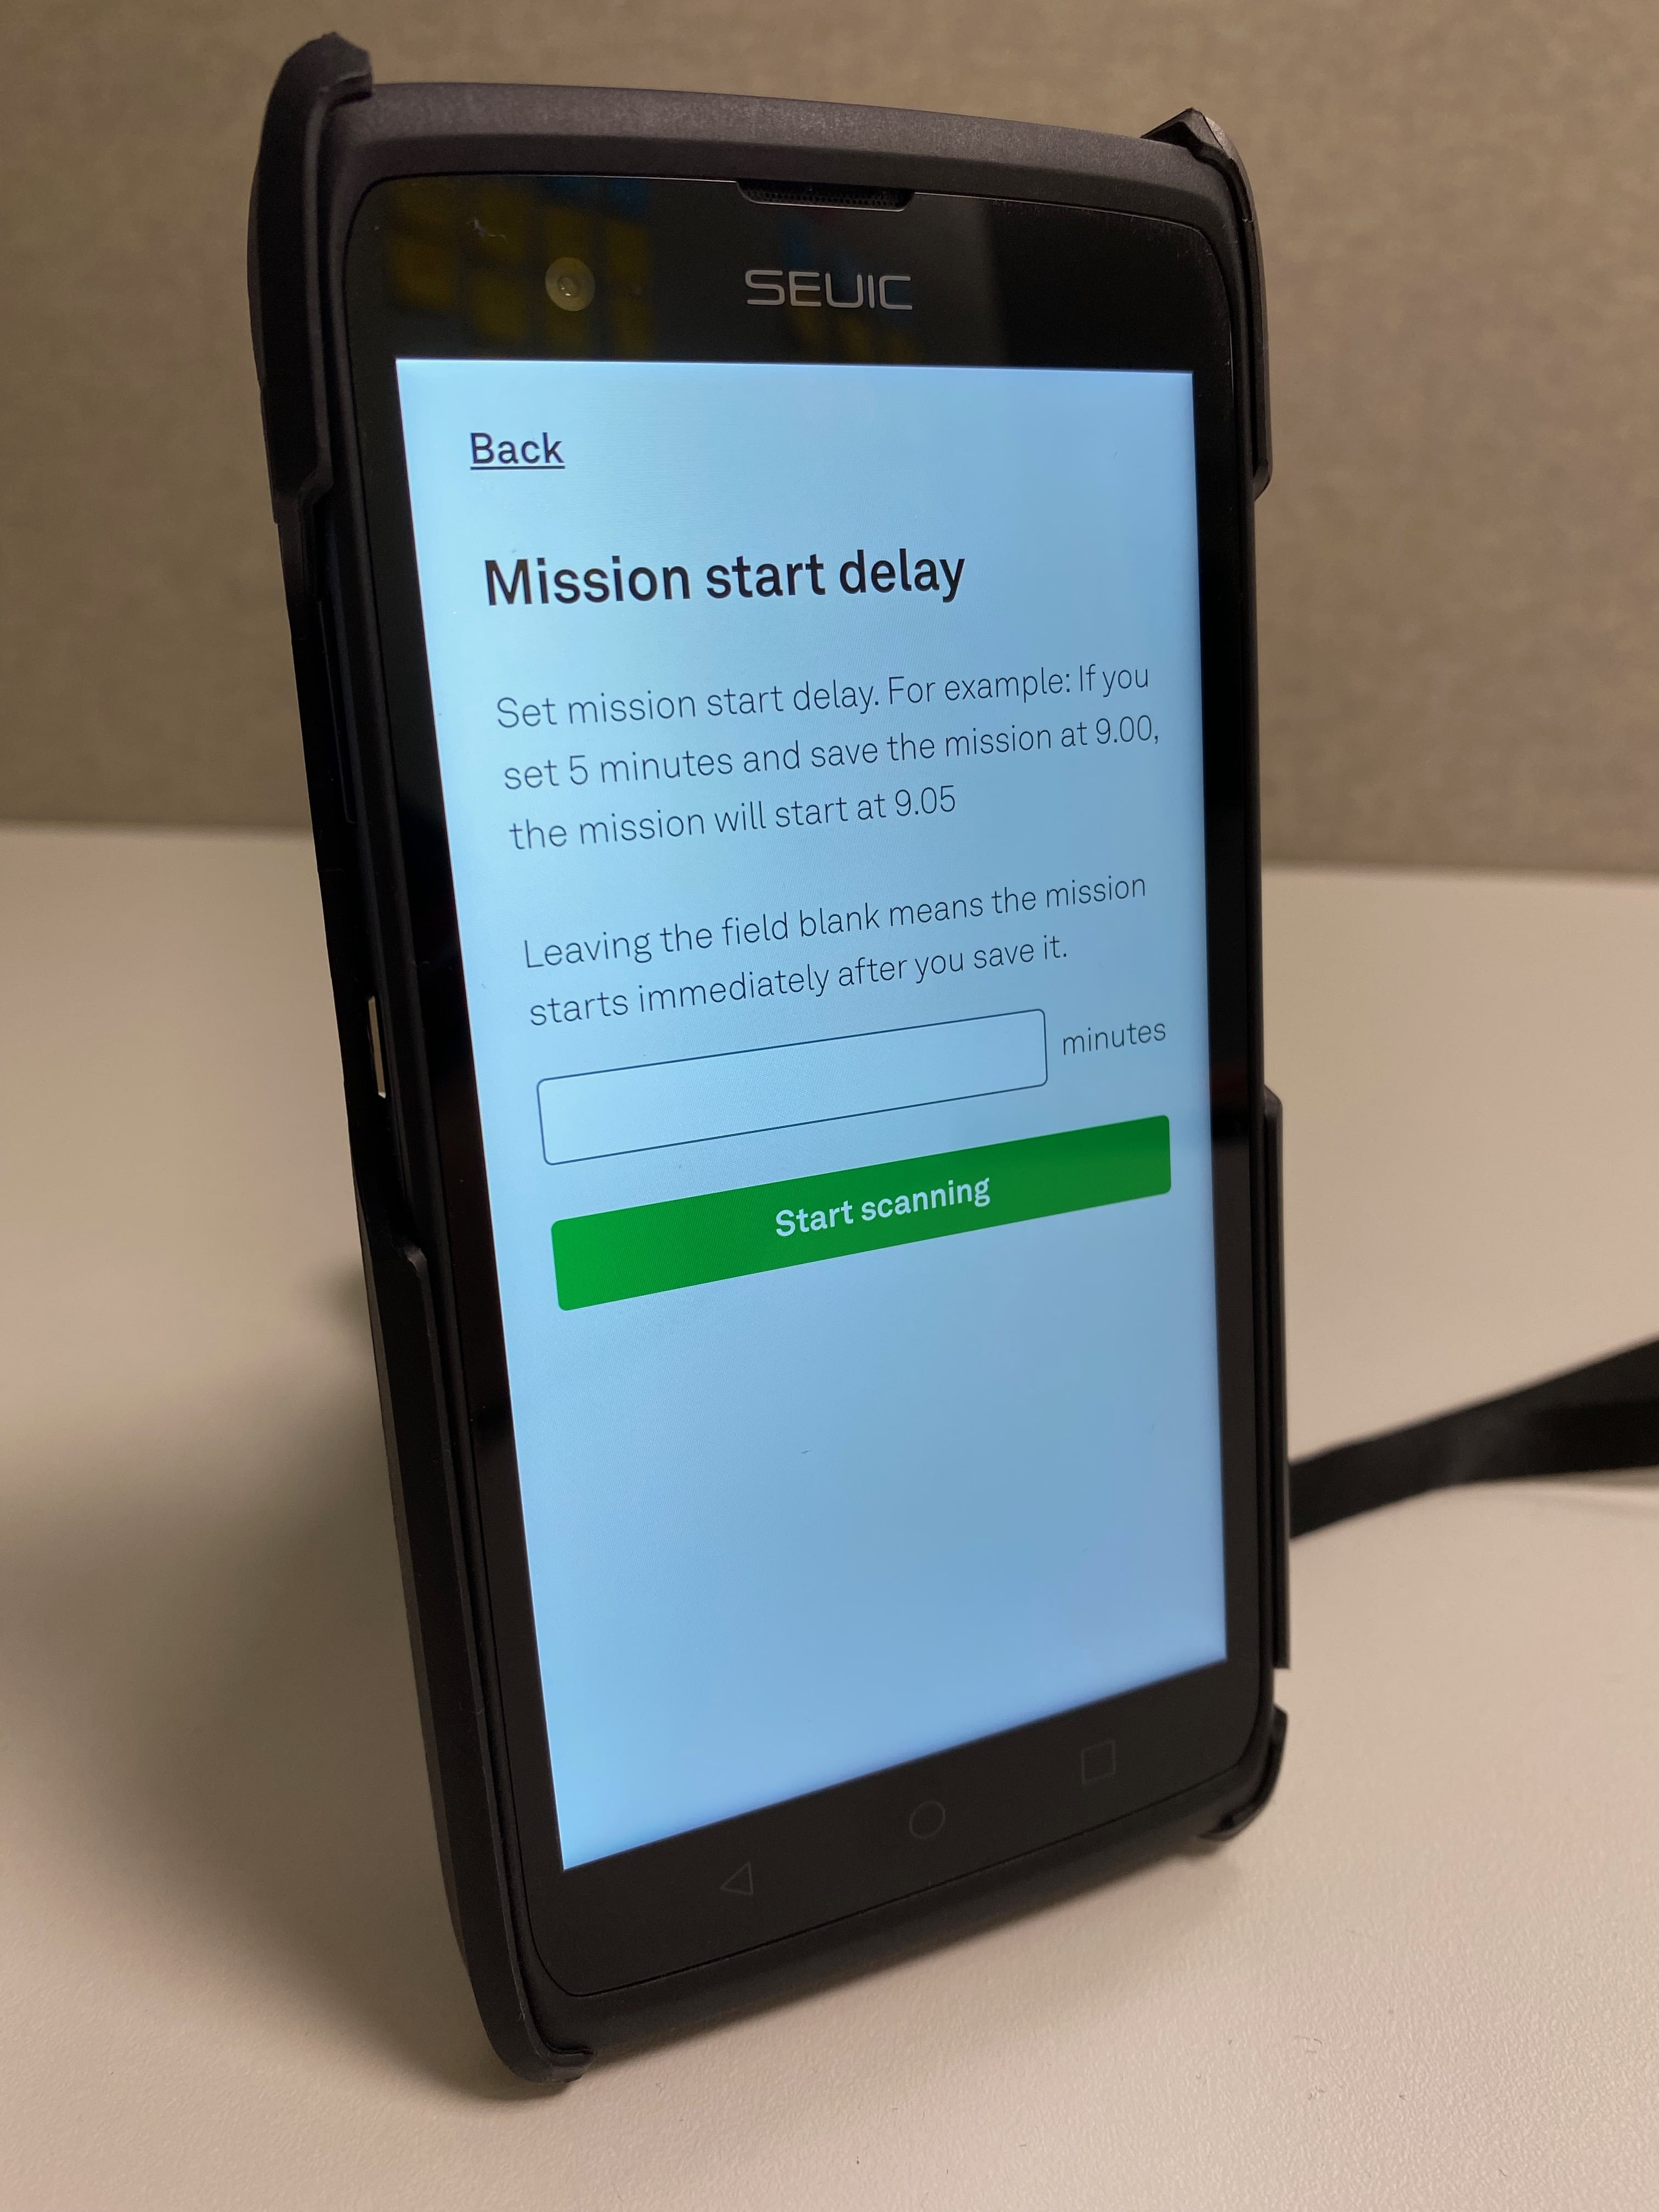
-
Scan the unique barcode to be used as Mission ID.
This barcode ID will be the name of the Mission in the Cloud.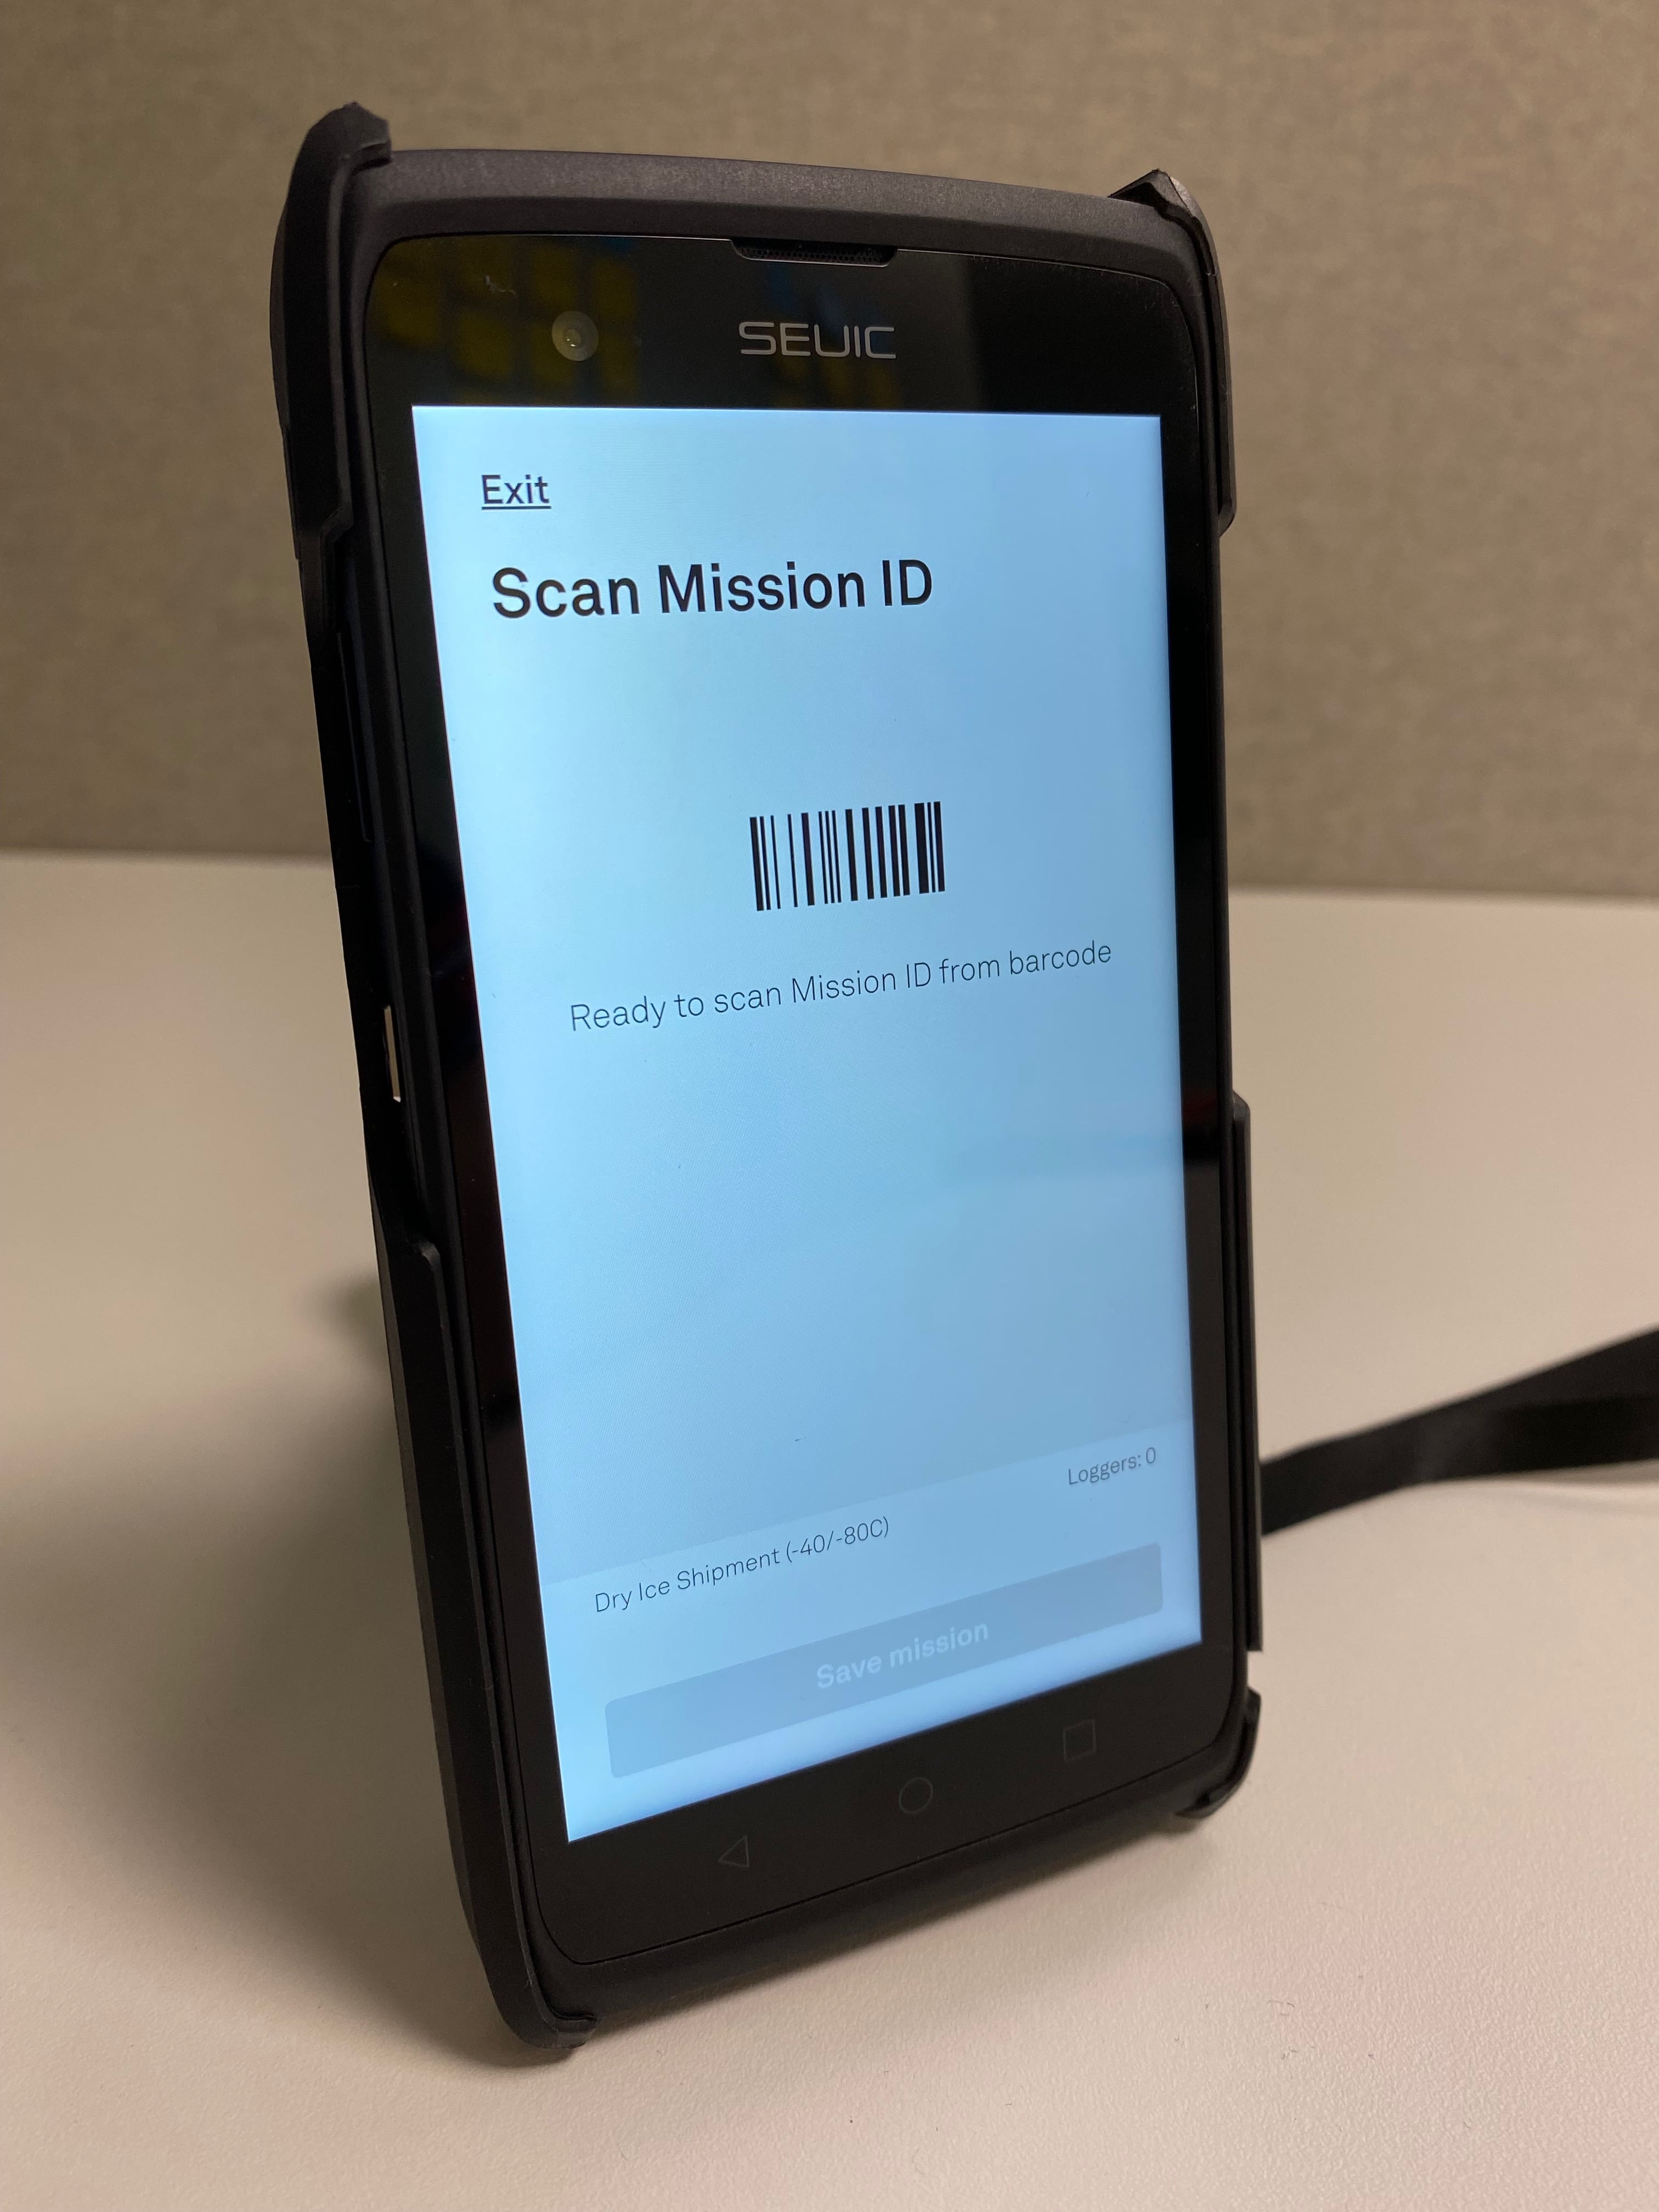
-
Scan the QR data loggers to be attached to this mission
- Logmore Scanpoint checks the following things:
- Mission status
- User permissions
- Logger health
- You will see Logger OK message if everything is fine (e.g., the logger does not have any active Missions).

- Logmore Scanpoint checks the following things:
-
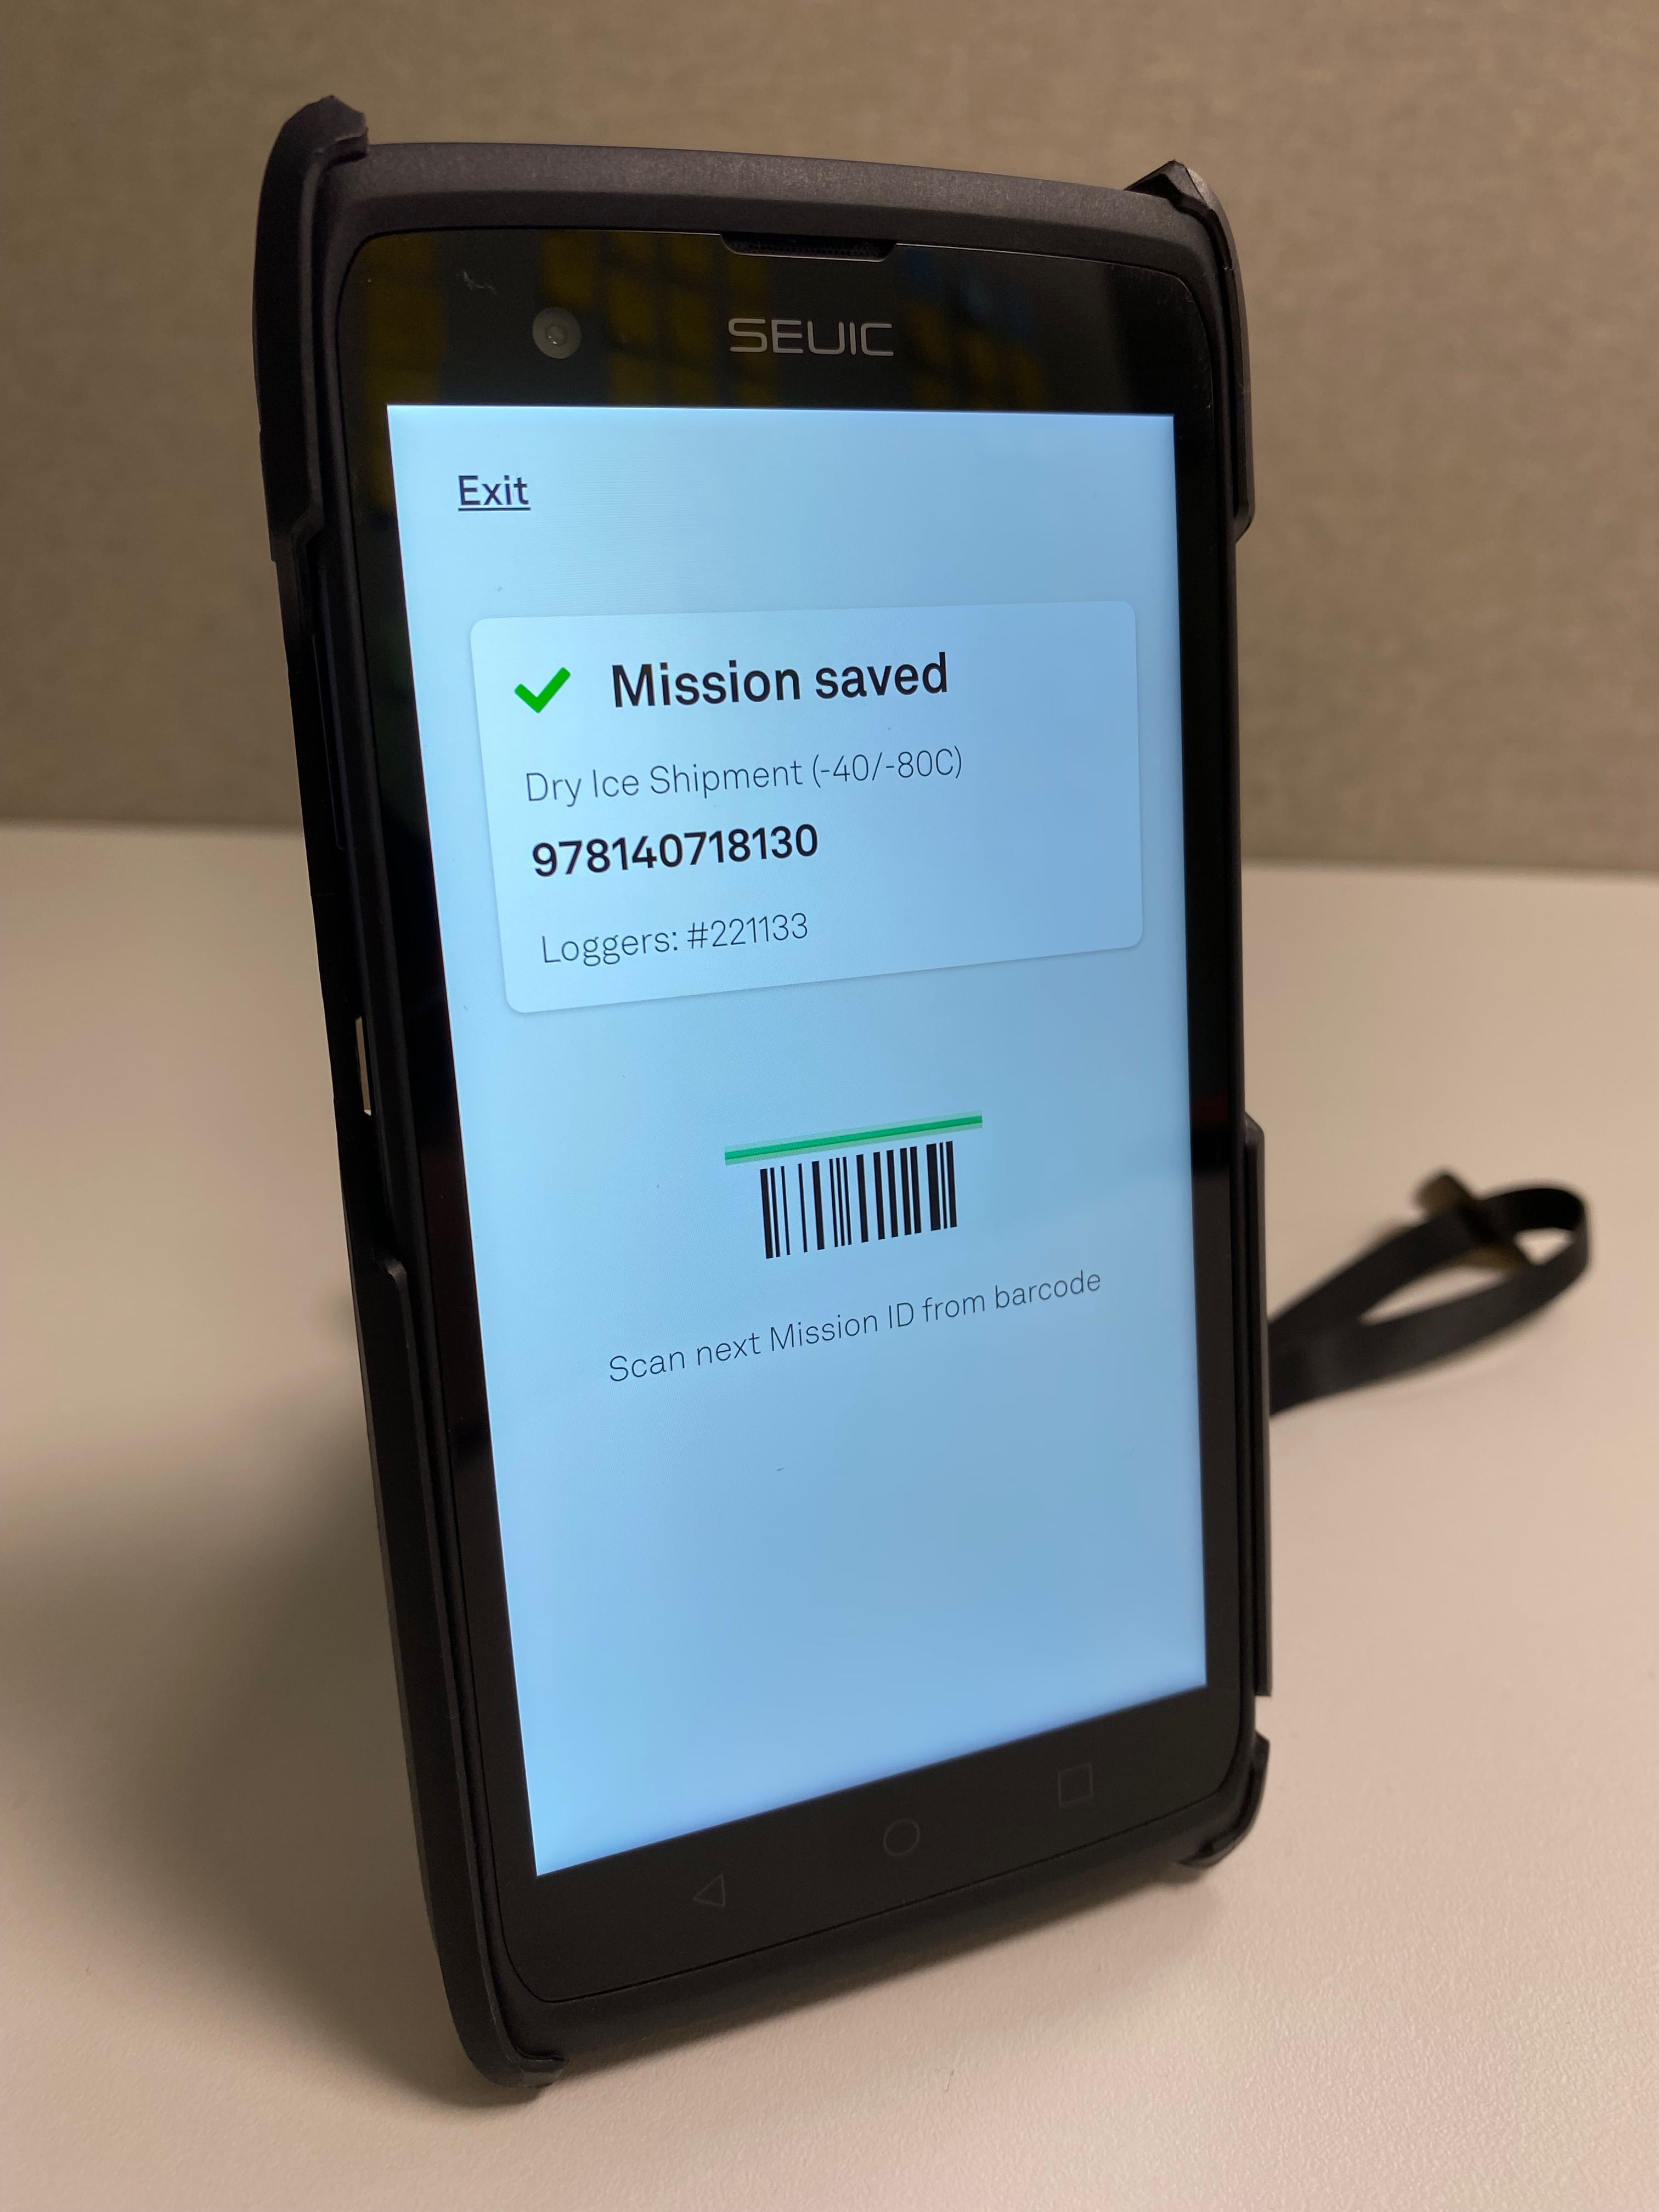
Click Save Mission

-
You can continue creating missions with the same Mission template and delay by just scanning the next barcode.
Check this video to see the Logmore Scanpoint in action.